
When my company’s Halloween office decoration contest started heating up, I couldn’t hold back.
Entering the contest wasn’t in the plan this year with so many other projects in the works.
But after seeing everyone else in the Halloween spirit, I thought:
“You cannot let another year pass without making something!”
This realization happened on a Tuesday.
The deadline was Friday.
As you might imagine, it took a few late nights to pull this off.
All in, I spent about 18-20 hours from start to finish.
And it was an absolute blast to build!
I’d love to hear from you, what you think of this build?

Image courtesy of YouTube
Here’s what some of the other Halloween office decoration contestants put together.


My cubicle sits at the corner of the whole cubicle complex.
Or, in “the land of misfit employees,” as my colleagues call it.

I only had a few parameters for the design to keep things simple:
- Make use of the upper cubicle wall
- Make it easy to install
- Don’t block the walkway
- Don’t inhibit the cleaning crew from tidying up after hours
- Prevent from getting easily damaged by children if they visit
- Make it affordable
- Take less than 3 evenings after hours to make
Here’s a walkthrough of how this Halloween office decoration came together.
Don’t miss the video walkthrough at the bottom of this page.
I began with a simple sketch to get the basic idea together.
This started with inspiration from Disney’s Pirates of the Caribbean France attraction images, mockups, and models (pirates are so awesome…)
But the complexity of certain elements made me switched to a more GoT inspired castle.

The entire castle only cost about $20 in materials.
Cardboard boxes and foam insulation panels from Home Depot worked perfectly and fit within my budget.

…Oh, and hot glue, lots of hot glue. AND a hot wire foam cutter!
I made this one a few years back for another outdoor Halloween display inspired by Disney’s Haunted Mansion ride.
(Yea, I appreciate the Imagineers…)

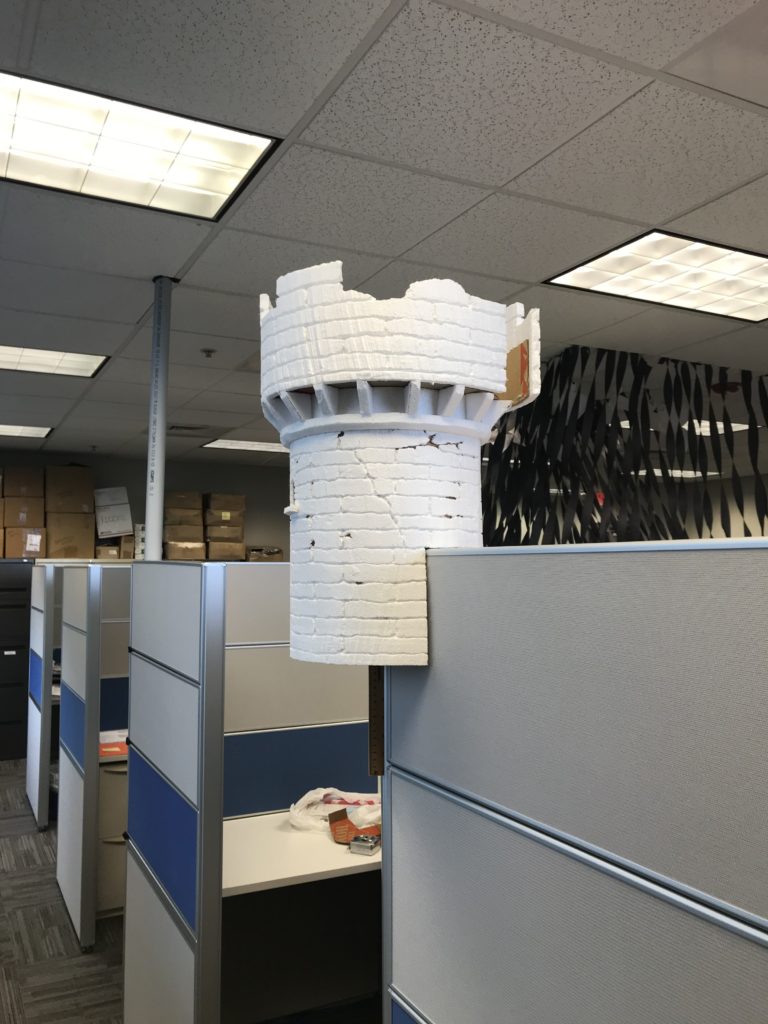
The first part to tackle was the corner bastion tower.
It’s the most complex element of this Halloween office decoration and helped gauge whether there’d be enough time to build a second one (which did not happen.)

I creased the cardboard along each fluted ridge so that it rolled in the correct direction for a cylinder shape.
Cardboard only rolls well in one direction.
As things came together, I couldn’t be picky about building complex shapes, like a cone-shaped roof.

The cardboard for this Halloween office decoration first had to be covered in foam.
So, a few thin sheets of foam were ripped using a hot wire foam cutter (to make bending easier.)


After the foam was secured, the battlements and details were added.
First, by adding corbels (brush up on your castle terminology here) to support the upper perimeter and add some visual interest.

Then, using a wood-burning tool (or soldering iron), I carved brickwork and two windows.
“Rapunzel, Rapunzel, let your hair down!”

Since this decoration had to sit over a cubicle wall, the next day it was taken for a fitting.
I marked the underside and cut an L-shaped notch where I thought it should slide over the cubicle wall.

You’ll notice this isn’t the same cube I showed before.
I kept the project out of sight until it was finished…

And because it was sitting in my car all day, the hot glue released the backside of the battlement area.
After taking measurements, the castle wall was ready to take shape.

The goal was to imply a decaying and broken castle wall.
This way, I wouldn’t have to make a foam wall the entire height of the cubicle, or have it look strange and out of place with a clean bottom edge.

The tower design was finished by cutting two windows, tapering the bottom and adding interior light.


Time was limited, so painting was done quickly and with very few layers.
It needed a primer anyway, so I went with a color that could double as a finishing coat.
What’s better than concrete gray for Halloween?!


What’s a Halloween castle decoration without a flag? (the pirate theme cannot go away)
The flag was made of a torn red shirt, spray painted black and hand-painted with white latex.


Only a few paint details were added for that extra little somethin’ that makes you want to “lean in” for a closer look…


Finally, installation day!
To secure this Halloween office decoration to the cubicle, I glued cardboard L-brackets behind each foam wall, and taped it to the flat top edge of the cubicle wall.
The tower just sid over the corner and rested into place.
Easy peasy!


Walmart had the perfect LED candle flicker light for this that automatically turned on for 6 hours and off for 18 hours.
I also grabbed light green underbrush moss from Hobby Lobby.
Filling the cracks in this Halloween office decoration put the icing on the cake!


Check out the closeup video walkthrough below!
So, what do you think?
I’d love to hear from you, please leave a comment below 🙂
You can share this using the e-mail and social media re-share buttons below. Thanks!
See The Latest: Go Back Home to See Our Latest Halloween Displays.
